The benefit of using Google Forms for your survey is that the application is connected to your Google Drive. So you can take advantage of sharing and collaboration features. Plus, you easily send the survey to those you’re connected with, as in the examples above. Here’s how to create a survey in Google Forms.
Google Forms Vs. Google Surveys
Before we get started, you might be wondering what the difference is between Google Forms and Google Surveys. And of course, when you should use which application? In a nutshell, Google Surveys (formerly Google Consumer Surveys) is a tool that businesses and online companies can use for consumer market research and content access. As Pollfish explains: On the other hand, Google Forms is a tool that anyone can use to gather information. With an easy-to-use interface and connection to Google’s suite of products and services, Google Forms is a more practical choice for most.
Create a Survey in Google Forms
When you’re ready to create your survey, head to Google Forms, and sign in with the Google account you’d like to use. Start with a Blank form. You can browse the Template Gallery if you like, but there is currently no “survey” template to help you out. Give your survey a name, title, and optionally a description. Google Forms saves your form automatically as you work on it.
Add Your Survey Questions
Select the first question already on the form and choose the type from the drop-down list on the top right corner. You can select any question type that fits and our tutorial on creating a basic form in Google Forms explains each type in detail. Just keep in mind that you want your survey to be easy for your participants to complete. So the bulk of your questions should be multiple-choice, checkbox, dropdown, or linear scale (rating). Since multiple-choice and checkbox questions are pretty common, we’ll use the other types here for you to see examples of how they can work for you.
Dropdown Question
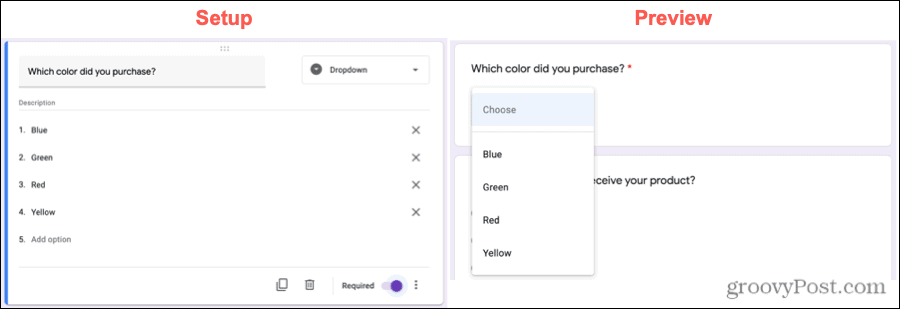
A dropdown question type is a good choice when respondents can only pick one answer and you have limited space. It’s basically a condensed version of a multiple-choice question. Optionally, you can turn on the toggle to make the question Required and click More Options (three dots) to add a Description.
Linear Scale (Rating) Question
A linear scale or rating question is another popular type you’ll find on a survey. This lets your participants rate an item on number scale. Like a dropdown question, you can make a linear scale question Required and add a Description if you like.
Multiple Choice Grid Question
Similar to a single multiple-choice question, a grid lets you group options together that can have the same, but only one, answer. For instance, you may want a simple “yes” or “no” answer to several questions at once. Along with options to make this question type required and include a description, you can limit respondents as well. Maybe you have many columns and want to allow only one choice per column. Click More Options and pick Limit one response per column.
Checkbox Grid Question
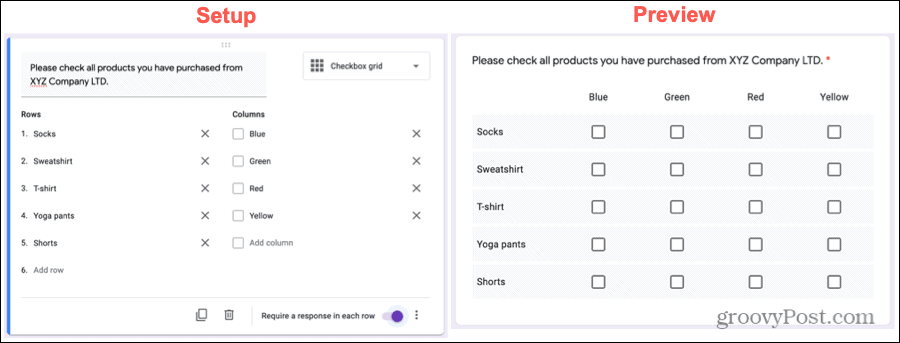
A checkbox grid is similar to the multiple-choice grid in that you can group things together. However, this type allows your respondents to choose more than one answer per row. If you prefer to limit respondents to one answer per column, you can do so with this question type too. To make this question required, turn on the toggle to Require a response in each row.
Direct Respondents to Sections Based on Answers
One feature of Google Forms that can be useful for surveys is the ability to direct a respondent to a particular section of the survey based on their answer to a question. In addition, you can give the option for them to submit the survey based on an answer. This feature is only available for multiple-choice, checkbox, and dropdown question types. And it obviously requires you to format your survey with sections. Here’s how to use this feature.
Add Sections to Your Survey
By default, the main part of your survey is considered Section 1. To add a section, click the Add section button at the bottom of the floating toolbar. Give your section a name and optionally a description. You can then add questions to your new section just like you did initially. This is a great way to stir the path of your participants so that they only see the questions (within the sections) that apply to their answers.
Adjust Your Questions
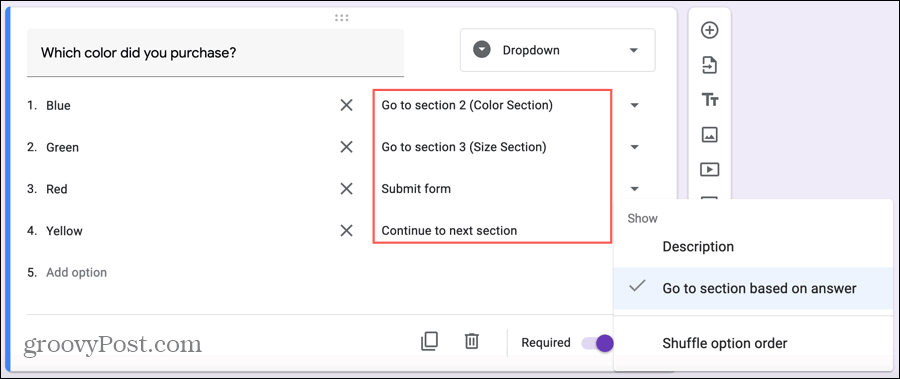
After you add your other section(s), you can adjust the questions that direct respondents easily. Go to the question, click More Options, and choose Go to section based on answer. You will then see drop-down boxes appear next to the answers. Choose where you would like respondents to go for each answer option. And remember, one choice is for them to simply submit the form.
View Survey Responses
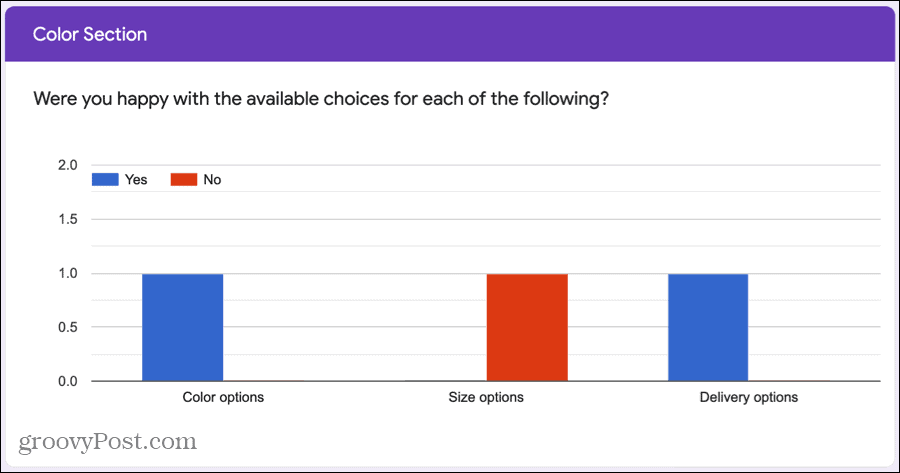
Just like responses to your other Google Forms, you can see these on the Responses tab for that survey. Answers display in charts, graphs, and lists making it easy for a quick summary at a glance. If you add sections to your survey for questions based on the answer, you’ll see each section and corresponding responses display clearly.
And the Survey Says…
Google Forms is an intuitive and convenient tool for creating surveys. And be sure to view those extra features like requiring an answer, limiting a response, or directing participants to other sections. Did you know that you can also create a quiz in Google Forms? Check out our tutorial for setting one of those up too!
![]()


