Some methods are easier than others, but if you want to restore deleted files on macOS, here’s how.
Check the Trash Folder
When you delete a file on macOS, it usually heads to the Trash folder (named Bin in some locales). Like the Recycle Bin on Windows, this acts as a storing ground for files before they’re finally deleted. If you’ve deleted a file on Mac, but you haven’t emptied the Trash folder, you can restore folders from it. The Trash folder appears as an app on the Dock for you to access.
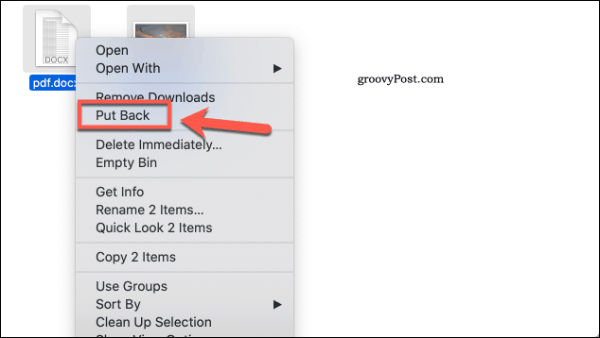
Click on the Trash folder icon on the Dock to access it. To restore an item from the Trash, right-click on a file and click Put Back to restore it. You can do this for multiple items by selecting them first, which you can do by holding the Shift key on your keyboard and clicking on each file, then right-click > Put Back to restore them.
If you’ve already deleted the file from the Trash, or otherwise emptied it, you’ll need to think about restoring the file from a backup. If you haven’t backed up your files, you can try the Disk Drill app to try and restore them instead.
Restore Deleted Files on macOS With Disk Drill
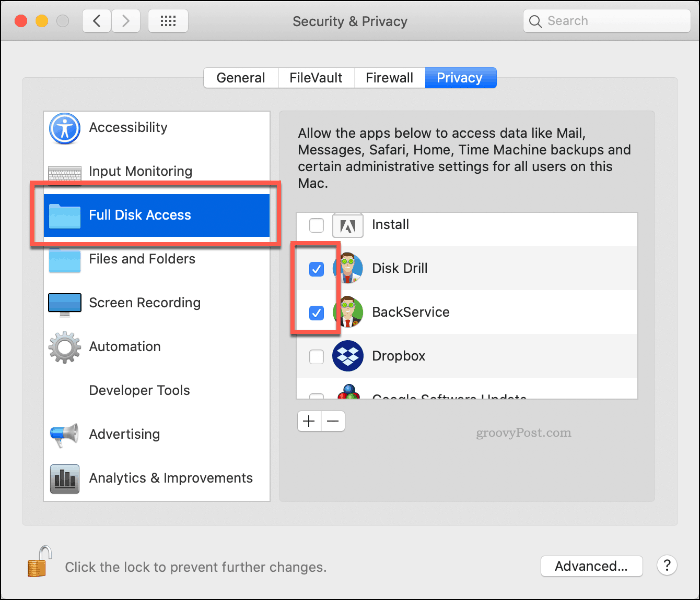
When you delete files from the Trash folder, it doesn’t completely remove all traces of those files from your drive. It removes information about the file, but the contents generally remain in place on your drive until overwritten by other files. This allows file restoration apps, like Disk Drill and others, to restore your files. Disk Drill isn’t foolproof, and it can’t always restore deleted files, especially if they were deleted some time ago. The best chance of success is to use Disk Drill to restore files that you’ve only just deleted. It’s free to use Disk Drill to scan for deleted files, but you’ll need to pay for Disk Drill Pro to be able to restore them. It’s also worth making as few changes as possible to your drive before you run the app. That includes downloading the Disk Drill app using another PC or Mac and running it from a USB flash drive, where possible. When you first run the Disk Drill app, you’ll be asked to grant full disk access. You can do this from System Preferences, which you can access from the Launchpad or as an icon on your Dock. From there, click Security & Privacy > Privacy > Full Disk Access and grant access to Disk Drill and BackService.
Once Disk Drill has the right permissions to run, run the app again. A list of detected drives and partitions will appear in the Disk Drill menu. To begin recovering files from your drive, click the Recover button next to it.
Disk Drill will take some time to scan your drive and recover any potential files. Once the process has completed, Disk Drill will show you what it has found. Many of the files may be junk files that you can ignore, but keep an eye out for files that you might want to recover. Right-click any file you want to restore and click Recover to recover them. Choose where you want to save the files, then click Choose to save.
Your deleted files should now appear in your chosen folder, ready for you to use again.
Protecting Sensitive Files on macOS
Backing up your sensitive files is the best way to avoid losing them. For Mac owners, setting up Time Machine on macOS is a good option. Time Machine allows you to restore your Mac files and installation to an earlier date, restoring any lost files in the process. Of course, having Time Machine backups are just one part of creating a wider data backup strategy for macOS. Keep local backups safe, but don’t forget to backup your files to a cloud storage provider like Backblaze or Apple iCloud or Google Drive for your own peace of mind.


![]()
