How To Customize Autoplay Actions In Windows 7
Click the Windows Start Menu Orb then Type autoplay into the search box. Click the Autoplay control panel link or Press Enter on your keyboard.
The autoplay control panel menu will appear. Here you can adjust what happens when several different types of media load onto your PC.
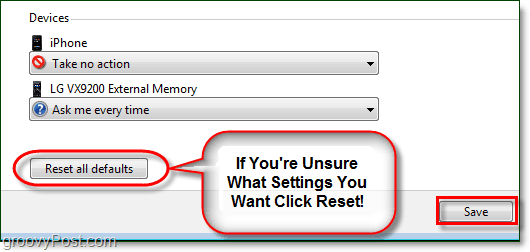
Click a drop menu under the media type where you want to change autoplay settings. For example, with Audio CDs you can assign a program to open and play it, ignore it (Take no Action), or display a prompt asking you what to do every time the media inserts. It sure is nice when connecting my iPhone that it will now just Take no action rather than displaying the annoying pop-up.
Perhaps you aren’t sure what settings you want, or just want to return settings to what they were when you installed Windows. At the bottom, there is a button to Reset all defaults. Don’t forget once you made all of your changes to Click the Save button!
Comment Name * Email *
Δ Save my name and email and send me emails as new comments are made to this post.


![]()
